Using Shaders and Rust to Render the Mandelbrot Set
programming, gamedev, rust, tutorial
I’m learning OpenGL to understand computer graphics and how things like libtcod and game engines in general work. This includes learning about shaders – parallelised programs that run on the GPU.
One of the shaders – the fragment shader – basically runs for every pixel on the screen. It’s used for showing textures, ligting and a bunch of other stuff.
And so thinking about shaders, I’ve realised that the pixels in the Mandelbrot set are calculated independently and so one should be able to write the whole thing in the fragment shader.
This is going to be using Rust (1.11.0 which is what I have installed at the moment) and Glium because I find it nicer to use than raw OpenGL. Plus, the concepts are mostly the same and the shader code is identical.
The Set Up
Let’s create a new project:
$ cargo new --bin benoît
$ cd benoît/
$ cargo run
(side note: looks like Rust & Cargo are handling non-ASCII characters just fine)
Add the Glium dependency to Cargo.toml:
[dependencies]
glium = "0.15.0"
Put this at the beginning of src/main.rs:
extern crate glium;And run to make sure everything’s fine:
$ cargo runIt should compile and run a small hello-world kind of program.
The Boilerplate
We need to type a bunch of code that loads and compiles our shaders, creates the OpenGL window, passes some vertices in (so we have something to show on the screen) and so on. This is not a Glium/OpenGL tutorial so the explanation will be brief.
First, we’ll create the vertex shader in src/mandelbrot.glslv:
#version 150 core

in vec2 position;

void main() {
    gl_Position = vec4(position, 0.0, 1.0);
}
Basically, OpenGL receives a ton of triangles. Each triangle is defined by three corners (vertices). The vertex shader is a program that runs for each vertex, does some processing on it and return the final position of the vertex in the range of -1 to 1 (the screen boundary).
This one just receives the vertex positions and passes them through unchanged.
The fragment shader will be in src/mandelbrot.glslf:
#version 150 core

out vec4 color;

void main() {
    color = vec4(1.0, 0.0, 1.0, 1.0);
}
This is where we’ll put all the actual coding. The shader runs for each pixel on the screen and outputs a colour that should be displayed on that point.
The colour consists of four elements: the red, green and blue channels and the alpha channel for transparency. They’re all in the range of 0 to 1.
For now, we return the same colour for every pixel.
Now for the Rust/Glium code. Open src/main.rs and type this in:
#[macro_use]
extern crate glium;

use glium::{DisplayBuild, Surface};
use glium::glutin::{Event, VirtualKeyCode, WindowBuilder};

#[derive(Copy, Clone)]
struct Vertex {
    position: [f32; 2],
}

implement_vertex!(Vertex, position);

fn main() {
    // Create the window
    let display = WindowBuilder::new()
        .with_title("Mandelbrot Set".to_string())
        .with_dimensions(1024, 768)
        .build_glium()
        .unwrap();

    // Compile the shaders
    let program = glium::Program::from_source(
        &display,
        include_str!("mandelbrot.glslv"),
        include_str!("mandelbrot.glslf"),
        None).unwrap();

    // Render 2 triangles covering the whole screen
    let vertices = [
        // Top-left corner
        Vertex{ position: [-1.0,  1.0] },
        Vertex{ position: [ 1.0,  1.0] },
        Vertex{ position: [-1.0, -1.0] },

        // Bottom-right corner
        Vertex { position: [-1.0, -1.0] },
        Vertex { position: [ 1.0,  1.0] },
        Vertex { position: [ 1.0, -1.0] },
    ];

    let vertex_buffer = glium::VertexBuffer::new(&display, &vertices).unwrap();

    loop {
        let mut target = display.draw();
        // Draw the vertices
        target.draw(&vertex_buffer,
                    &glium::index::NoIndices(glium::index::PrimitiveType::TrianglesList),
                    &program,
                    &uniform! {},
                    &Default::default()).unwrap();
        target.finish().unwrap();

        for event in display.poll_events() {
            match event {
                // the window has been closed by the user:
                Event::Closed => return,
                // Quit on Esc:
                Event::KeyboardInput(_ , _, Some(VirtualKeyCode::Escape)) => return,
                _ => ()
            }
        }
    }
}
We need to add #[macro_use] to extern crate glium, because we’ll be using a couple of macros glium exports: implement_vertex and uniform.
Next, we define the Vertex struct. This represents the vertices (triangle corners) that will be passed to the vertex shader.
The implement_vertex macro lets you specify which fields of the vertex struct are to be passed to the vertex shader.
Next, we create the main window. We can set the window title, its size and a bunch of other things not shown here.
Then we load the vertex and fragment shaders (include_str is a Rust macro that loads a file from disk and put its contents where it’s called). We do this instead of having to maintain the shader code inside the main.rs as a string or having to load it when the program runs. This way, it’s compiled in.
We then define two triangles that will cover the entire screen. Both x and y coordinates go from -1 to 1 where 0 is the centre of the screen, y goes up and x goes right (like in most mathematical graphs and unlike a lot of window or graphics tools).
Each triangle has three corners so we have two sets of three vertices. For the top-left triangle: the top-left corner -1, 1, top-right: 1, 1 and bottom-left: -1, -1.
For the bottom-right triangle: the bottom-left corner: -1, -1, top-right 1, 1 and bottom-right 1, -1.
We use the vertices array to create a vertex buffer which will send the vertices to the video card. Normally, a game would send thousands or even millions of vertices to the card every frame.
Next is the render/input loop where we tell glium to draw everything using everything. Glium expects the vertex buffer, programs, indices, uniforms and any draw parameters to pass all at once in a single function call. Raw OpenGL, has a separate call for each of these things and it’s easy to mess up and get to weird states that way.
And finally, we process the OS window events and quit when the user presses Escape or closes the window.
Now running this should produce a window filled with lovely magenta.
From now on, we will leave the Rust program and the vertex shader alone and will only work with the fragment shader.
The Theory
So we’ll need to know how to calculate the Mandelbrot set. That is easy to remember, because it’s in the chorus of everyone’s favourite song about the fractal:
https://www.youtube.com/watch?v=iL2jYBJ2Qas
(in case the video goes down, it’s the song Mandelbrot Set by Jonathan Coulton)
So, the Mandelbrot set consists of complex numbers. We will treat the centre of the screen to be 0 on the complex plane and say the top and bottom of the screen to be 1 and -1.
For each pixel, we will find the complex number it corresponds to and then:
-
Set
Cto this complex number -
Set
Zto0 -
Calculate
Z = Z^2 + Ca set number of times (say a 100) -
Test whether the result’s absolute value is less or equal to
2
If it is, the point belongs to the Mandelbrot set, otherwise it doesn’t.
One thing to note that the more iterations we do, the more precise measurements we’ll get. But that will also make it longer to compute.
The Pixels
So the fragment shader is a program that runs for every pixel on the screen. The first thing we need to figure out is how to get the pixel coordinates in the shader program.
The shaders have a bunch of built-in variables, and gl_FragCoord has what we need. It’s a vec4 which contains the pixel coordinates.
So, to test that this works, let’s replace the color line in src/mandelbrot.glslf with this:
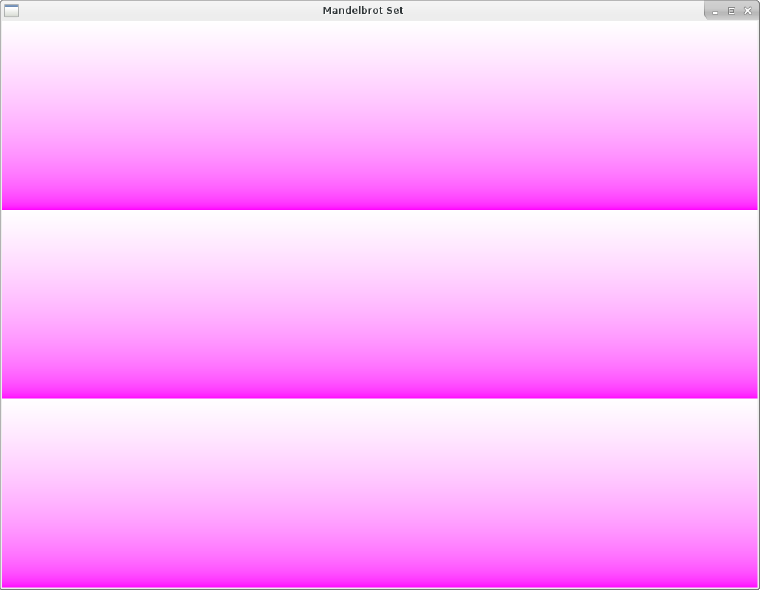
color = vec4(1.0, (mod(gl_FragCoord.y, 256) / 256), 1.0, 1.0);I.e. we return the same value as before, except for the green channel, which now takes the pixel’s y coordinate into consideration.
The value in gl_FragCoord is the actual pixel position (e.g. between 0 and 767 since our window has the height of 768). The point of origin (0, 0) is the bottom-left corner (y is going up, x is going right).
Since the colour values need to be between 0 and 1, we need to convert them. Doing a modulo 256 will move the values into the 0-255 range and dividing by 255 will turn it into a 0-1 range.
Here’s what you should get:
So now all we need to do is replace that with a colour for the Mandelbrot set.
Let’s convert the coordinates first. The stuff from gl_FragCoord will be in 0-1023 for x and 0-767 for y. The Mandelbrot set is contained within -2 to 2 on both axes. So we want to convert the pixel coordinates to that range.
We could get x to the 0 to 1 range by dividing it by 1023 and y by dividing it by 767, but that would mean our plane would be a bit squished – because the distance of 1 would mean something else on x and on y. So let’s divide both by the same number.
If we divide both coordinates by 767, it will get the y axis into the 0 to 1 interval. We can then multiply it by 4 to get it to the 0-4 range and finally subtracting 2 will get us -2, 2. Doing the same to x will just give us some extra space on the sides.
Let’s add this line to our shader:
vec2 c = gl_FragCoord.xy / 767.0 * 4.0 - 2.0;The xy component of gl_FragCoord is a vec2 containing the x and y positions. And the shader language supports vector operations nicely so we don’t have to write this for x and y separately. Cool!
Simplifying this highly complex mathematical formula is left as an exercise for the reader.
Now this won’t do anything just yet (we’re not using our c variable anywhere) but running it should not result in an error. When glium compiles the shaders, it would crash with an error message if they failed to compile. So it’s always good to run the program when you modify the shaders.
|
Note
|
some of glium’s errors only appear if you compile with the debug mode (i.e. without the --release flag)!
|
Okay, so let’s see whether that point is in the Mandelbrot set or not. The initial z should be set to 0, but the first iteration will result in it being set to c, so let’s just start there. Next we just square it, then add the position and do this several times. Finally, we check whether the point diverges or not.
Unfortunately, glsl’s vector operations don’t work the same way as multiplying (or squaring in our case) complex operations do, so we’ll have to calculate z * z manually:
vec2 z = c;
float i;
for(i = 0; i < 9; i++) {
    z = vec2(pow(z.x, 2) - pow(z.y, 2), 2 * z.x * z.y) + c;
}
(I tried just multiplying the two z together, but produced nothing like the Mendelbrot set. In my defense, we did vectors and complex numbers it high school and that’s been almost ten years ago)
I’ve chosen 10 iterations at first so as not to choke our poor GPU but we’ll crank it up later.
To find out whether the point actually belongs to the set, we calculate its absolute value (which is equal to the corresponding vector’s length). If it is equal to or lesser than 2, it’s in the set.
We’ll mark points in the set black and everything else white for now:
if(length(z) <= 2.0) {
    color = vec4(0.0, 0.0, 0.0, 1.0);
} else {
    color = vec4(1.0, 1.0, 1.0, 1.0);
}
So the full shader will look like tihs:
#version 150 core

out vec4 color;

void main() {
    vec2 c = gl_FragCoord.xy / 767.0 * 4.0 - 2.0;

    vec2 z = c;
    float i;
    for(i = 0; i < 9; i++) {
        z = vec2(pow(z.x, 2) - pow(z.y, 2), 2 * z.x * z.y) + c;
    }

    if(length(z) <= 2.0) {
        color = vec4(0.0, 0.0, 0.0, 1.0);
    } else {
        color = vec4(1.0, 1.0, 1.0, 1.0);
    }
}
Now see the result with cargo run:
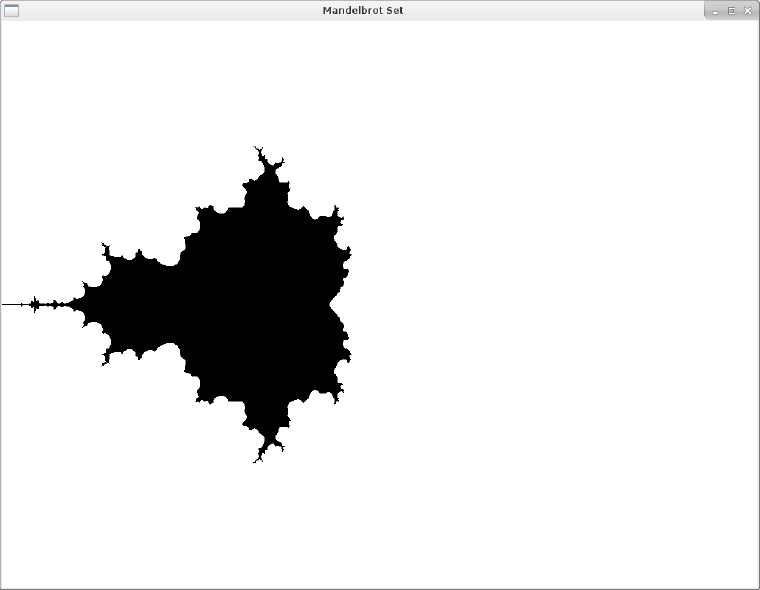
Whoa! I did not expect that to be honest. Thought it would be sort of rounder but it has these weird twigs sprouting out.
Anyway, this definitely is the right shape, so lets set the iterations to a 100!
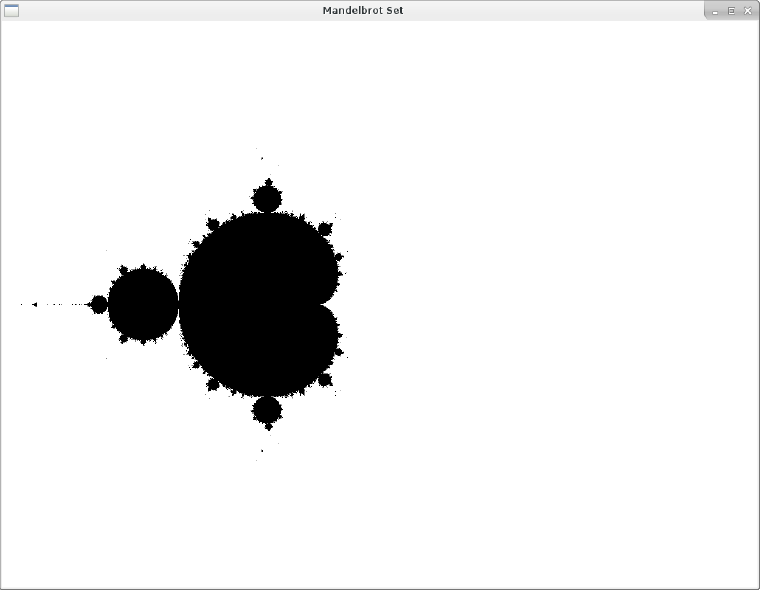
There we go.
The Pretties
But all the fancy internet mandelbrots have more than 2 colours. What gives?
The set itself is defined as the points that do not diverge. Those are all the boooooring black pixels in our picture. So what people do is colour the divergent points based on various criteria.
Let’s try something simple and just assign a greyscale value based on the number of iteration when the z point diverged.
First, we’ll take the maximum number of iterations out into a variable, and then we’ll move the check for the divergence into the for loop:
int max_iterations = 100;
float i;
for(i = 0; i < max_iterations; i++) {
    z = vec2(pow(z.x, 2) - pow(z.y, 2), 2 * z.x * z.y) + c;
    if(length(z) > 2.0) {
        break;
    }
}
Now when the loop exists, we have the number of iterations stored in i. We change the if branch to this:
if(i == max_iterations) {
    color = vec4(0.0, 0.0, 0.0, 1.0);
} else {
    float val = i / float(max_iterations);
    color = vec4(val, val, val, 1.0);
}
The i == max_iterations condition will only be true when the z did not diverge (i.e. we went through the whole loop without an early break). In that case, we return black just like before.
But if it did diverge, we’ll convert i into the (0, 1) space and return that on the RGB channels.
Here’s the greyscale version:
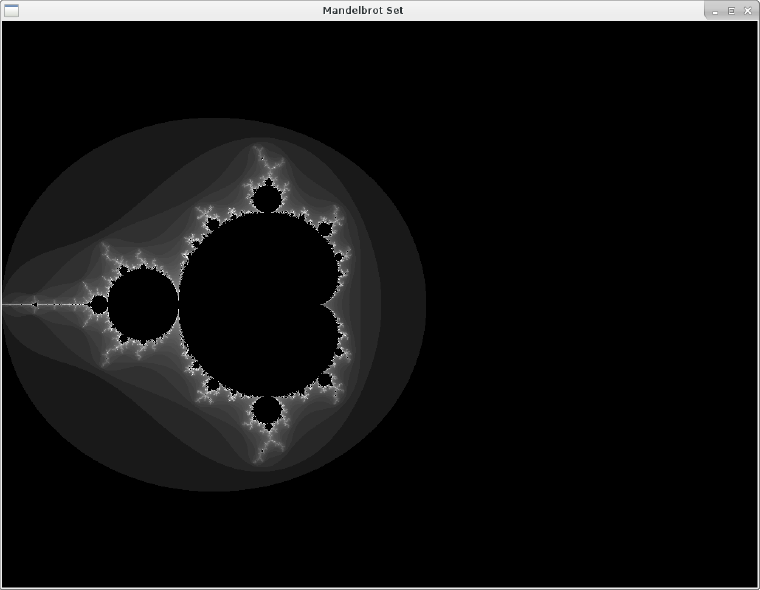
This actually looks nice, but the song promised day-glo! Let’s add some colours.
I’d like to have a similar situation as with the greyscale version – we feed it a value from 0-1 based on the number of iterations it took to diverge and convert that to a colour.
I can’t think of a simple way to do that with RGB, but in the HSV colour space, the H stands for hue which means colour, basically. So let’s specify our target colour in HSV and convert it to RGB.
Here’s an HSV to RGB conversion function I found on the internet:
vec3 hsv2rgb(vec3 c) {
    vec4 K = vec4(1.0, 2.0 / 3.0, 1.0 / 3.0, 3.0);
    vec3 p = abs(fract(c.xxx + K.xyz) * 6.0 - K.www);
    return c.z * mix(K.xxx, clamp(p - K.xxx, 0.0, 1.0), c.y);
}
Now we we just pass the val in our else branch to that:
color = vec4(hsv2rgb(vec3(val, 1.0, 1.0)), 1.0);And we have a colourful fractal:
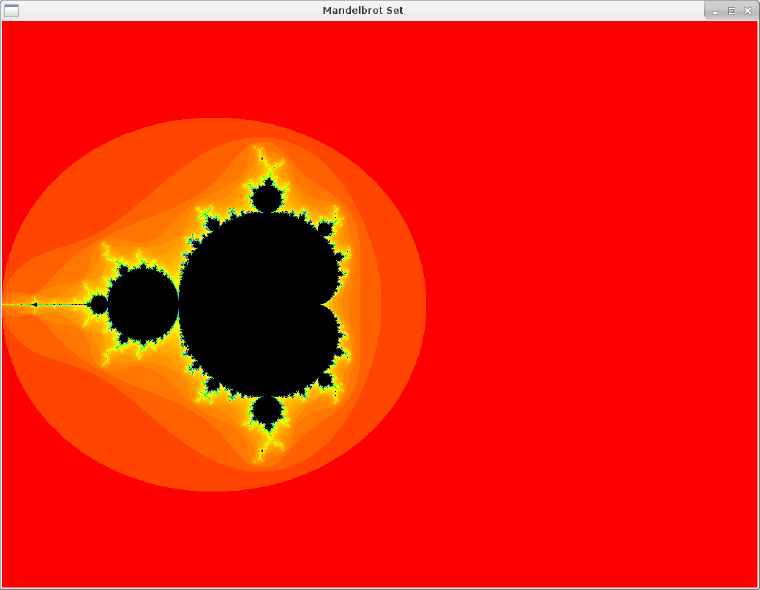
Now let’s ramp up the iterations:
int max_iterations = 1000;To get the final result:
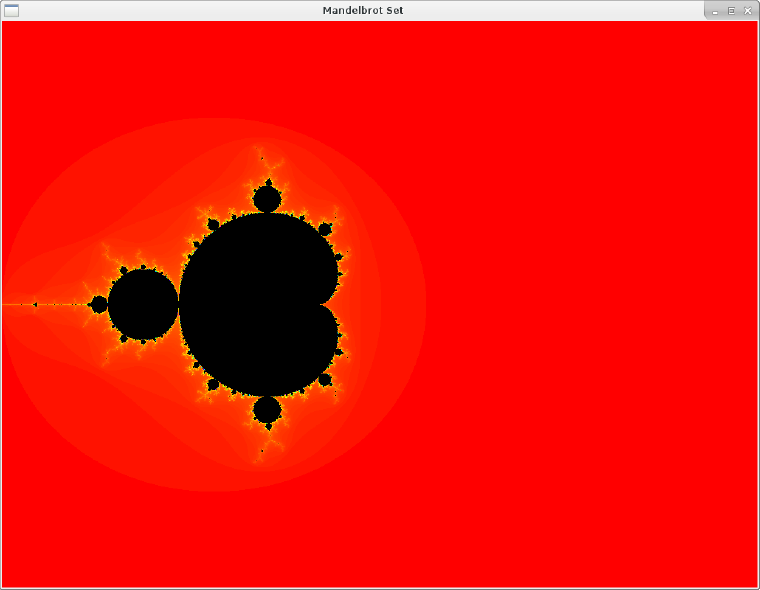
In Closing
-
For a real Rust program, run it with
cargo run --releaseand build withcargo build --release. I’m not sure how much it matters here since all the processing happens on the GPU anyway. -
You can implement zoom by passing what the screen centre stands for (it’s
(0, 0)in our case but can be anything) and the zoom level as uniforms. (and you can read the keyboard and mouse events to do this in the window event loop). - The real coolness of fractals is when you zoom in. Note that since all this is a 32-bit floating point math, it will break down very quickly.
- There are colour smoothing techniques as well as math tricks to reduce the computational complexity and of course big-number calculation schemes to get better results. How much of that is feasible in the fragment shader I have no idea.
But it’s a really neat exercise that let me understand the fragment shader a bit more.
